<!doctype html>
<html>
<head>
<title>Niki's HTML 5 Short Page</title>
<meta charset="utf-8" />
</head>
<body>
<h1>Niki's HTML 5 Short Page</h1>
<p>Welcome!</p>
</body>
</html>
Test your valid HTML 5 page with validator.w3.org. Start coding from this "Hello World" template.
tiistai 26. marraskuuta 2013
torstai 17. lokakuuta 2013
Java - Hello World with Eclipse Quickly
Open Eclipse and create new "Java Project"
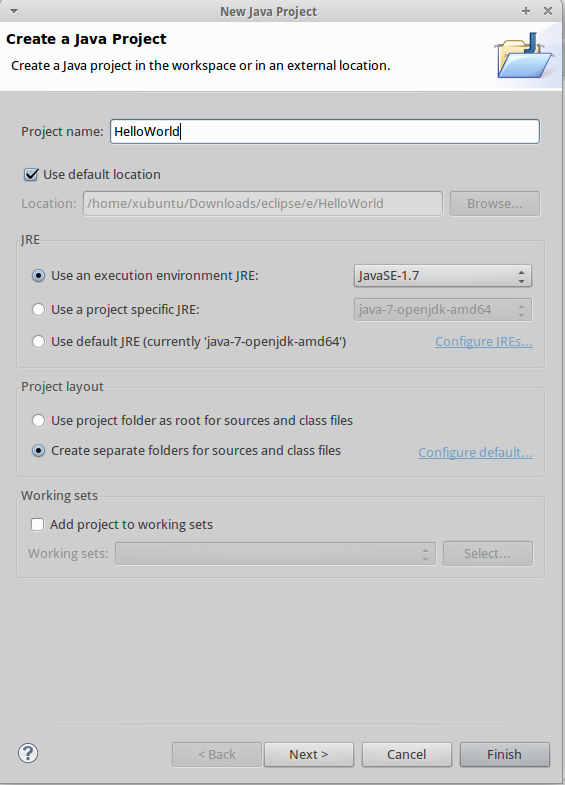
Give a name for your project
 Click Finish
Create new class inside src folder

public class Hello {
public static void main(String[] args) {
}
}
write "syso" and press CTRL + SPACE
then add print text
public class Hello {
public static void main(String[] args) {
System.out.println("Hello World!");
}
}

It prints Hello World! to Console.
TIPS: to install JDK on Linux: sudo apt-get install openjdk-7-jdk
Give a name for your project
Create new class inside src folder

Write "main" inside hello and press CTRL + SPACE and ENTER to autocomplete

public class Hello {
main
}
public class Hello {
public static void main(String[] args) {
}
}
write "syso" and press CTRL + SPACE
then add print text
public class Hello {
public static void main(String[] args) {
System.out.println("Hello World!");
}
}

It prints Hello World! to Console.
TIPS: to install JDK on Linux: sudo apt-get install openjdk-7-jdk
keskiviikko 2. lokakuuta 2013
How To Use CVS-VersionControl (School notes)
How to pull existing project from CVS:
Start Eclipse
Notice that only one person in team pushes the project into workspace and then other team members pull the project from cvs.
Select File -> New -> Project
and select CVS - Projects from CVS

From the next window select existing project.

Location:
Host: proto999.haaga-helia.fi // 999 change this to your own group number
Repository path: /home/cvs
Authentication
user: accountname
password: your pw
Connection
Connection type: extssh
click next
Enter Module Name:
choose use an existing module
select the project you want and click finnish
How to push
Right click your project, first select update and then commit

Creating new project:
Simply right click again your project, select team menu and choose share project.
torstai 26. syyskuuta 2013
Eclipse cannot create server problem and delete server
If you ever run to this problem that you cannot add Tomcat server to your Eclipse it is very easy to fix.

Go to Window–>Preferences–>Server–>Runtime Environments click edit and fix the broken path/link for the server. (Locate the Tomcat folder you have unzipped)

After that it should work.
Delete server
Right click servers from the left side menu, select delete and tick box delete from disk. Also from the bottom view of eclipse select servers and delete them there.

maanantai 23. syyskuuta 2013
torstai 19. syyskuuta 2013
MySQL From Command line
If you have set up or you are going to use MySQL with SSH for example not via PHPMyadmin open your terminal and type
mysql -u username -p
Which means go to mysql, after -u put your username and -p is password, but do not enter your password after that it is going to ask it in the next prompt.
Enter your password (if you are using Putty press SHIFT + INSERT to paste)
Create new database:
CREATE DATABASE Niki_Aanitteet;
To select database you want to use insert
use databasename;
to see what tables you have type
show tables;

To see what you have in the tables type
select * from tablename;

As you can see it works with same commands as phpmyadmin. If you want to add a table here is my example code:
CREATE TABLE Niki_Aanitteet(
id SMALLINT NOT NULL AUTO_INCREMENT PRIMARY KEY,
artisti VARCHAR(255) NOT NULL,
levyn_nimi VARCHAR(255) NOT NULL
) ENGINE=Innodb DEFAULT CHARSET=latin1;
And to insert some data into the tables:
INSERT INTO Niki_Aanitteet(artisti, levyn_nimi) VALUES('PSY', 'Gangnam Style');
INSERT INTO Niki_Aanitteet(artisti, levyn_nimi) VALUES('Train', 'Drive By');
INSERT INTO Niki_Aanitteet(artisti, levyn_nimi) VALUES('Rihanna', 'Where Have You Been');
To see field, type, null, key, default, extra information type:
describe Niki_Aanitteet;
Create new user for your database and grant all privileges:
CREATE USER 'shnigi'@'localhost' IDENTIFIED BY 'passwordhere';
GRANT ALL PRIVILEGES ON * . * TO 'shnigi'@'localhost';
Explained bit better here: https://www.digitalocean.com/community/articles/how-to-install-wordpress-with-nginx-on-ubuntu-12-04
create database testdatabase;
create user 'folio'@'localhost' identified by 'password123';
grant all privileges on testdatabase.* to 'folio'@'localhost' with grant option;
sunnuntai 8. syyskuuta 2013
perjantai 30. elokuuta 2013
Dynamic Web Project small view around
When you have created a new Dynamic Web Project it will look like this. A lot of folders. Don't panic. We are going to need just few of them in the beginning. WebContent as the name says is the folder for all your web content. For example, images, CSS and HTML goes here. There are two folders inside WebContent. META-INF which we are not going to touch and WEB-INF where you can add libraries.

To start developing your web project just simply right click WebContent and select New - JSP file.

This is your "index.html" page. You can start creating HTML normally.
Next do the same thing, right click WebContent, but select File instead of JSP and type style.css and finish for example. This is your CSS file. Both index and css straight under the WebContent. You could also create a new folder inside WebContent for example "images" and add some content to your web page.
When you have build your page layout you can open folder Java Recourses. Inside SRC folder you add all the java files for your project. Of course you need some Java knowledge.
To run your page, press the green play button

Select Run On Server, pick Tomcat and Finish

Now Eclipse opens Web browser and shows your page.


This is my test page and my folder hierarchy.
Starting Java Developing - Dynamic Web Project - With Eclipse
During the Spring we had a course named software developing. We had to use Eclipse, Dynamic Web Project and Tomcat server. Now I'm going to tell few things about this process.
1. Start by downloading the newest Eclipse version from http://www.eclipse.org/downloads/
2. Select this version: Eclipse IDE for Java EE Developers and download either 32 or 64bit version depending on your system.
3. Eclipse comes in a Zip file, program called 7-Zip is very good program to unzip zip files. So download it from http://www.7-zip.org/ unless you have another program to unzip it.
4. When you have unzipped Eclipse you will need Tomcat. Tomcat runs Java program in the server. It is good to have it locally on your computer that you can test your program in real time.
5. Go to Tomcat web-page http://tomcat.apache.org Under downloads there are different versions. Pick for example version 7 and download it under Binary Distributions - Core: and select Zip file.
6. Again, unzip the tomcat somewhere so your folder should look like this:


9. Now it's time to add Tomcat server. Select File - New - Other and type server. Select next.


11. From the server runtime environment select Add and locate Tomcat where you unzipped it.

12. Click Finnish and you are ready to go, or should be. Now you can start creating your Dynamic Web Project.
1. Start by downloading the newest Eclipse version from http://www.eclipse.org/downloads/
2. Select this version:
3. Eclipse comes in a Zip file, program called 7-Zip is very good program to unzip zip files. So download it from http://www.7-zip.org/ unless you have another program to unzip it.
4. When you have unzipped Eclipse you will need Tomcat. Tomcat runs Java program in the server. It is good to have it locally on your computer that you can test your program in real time.
5. Go to Tomcat web-page http://tomcat.apache.org Under downloads there are different versions. Pick for example version 7 and download it under Binary Distributions - Core: and select Zip file.
6. Again, unzip the tomcat somewhere so your folder should look like this:

7. Now open the Eclipse
8. In Eclipse, select File - New - Dynamic Web Project. If it is not there, select other and search it. Select a name for your project and press Finish.


9. Now it's time to add Tomcat server. Select File - New - Other and type server. Select next.

10. Select Tomcat version 7 under apache folder and type something similar if the forms are empty.

11. From the server runtime environment select Add and locate Tomcat where you unzipped it.

12. Click Finnish and you are ready to go, or should be. Now you can start creating your Dynamic Web Project.
Tilaa:
Blogitekstit (Atom)